Friday, 26 March 2010

Home Network

I wanted to create a home network, primarily for sharing printing facilities but also giving the possilbility of file sharing.

The main computer runs Windows 7 and the Laptop runs Windows Vista. The instructions for Windows 7 says that a homegroup is for computers which run the Windows 7 operating system. However, I decided to see what would happen if I attempted to use it to network the laptop with the PC.

I went to control panel


Chose network and internet


Then HomeGroup


Then Home network


You get a visual display of your home network


The network settings are now set to home.
I then clicked on choose Homegroup and sharing options.

Selected all the sharing options I wanted and then started up the laptop. I went to network


Then a list of the network is displayed and it is only a question of logging onto the system and sharing files or devices


Friday, 19 March 2010

Changing the BIOS


The BIOS was changed on Computer R37182 to reorder boot orderon start up.


The computer was connected to mouse, monitor and keyboard and started up. Before the operating system was loaded F2 was pressed to enter the BIOS.


Advanced BIOS features was selected


The first Boot device was already set to CDROM


So it was changed to Floppy


F10 was pressed to save and Exit Setup


Save to CMOS and Exit Y/N entered yes
Settings are now changed

Friday, 12 March 2010

PC R37182 reassembly

The PC was now ready for reassembly.

Firstly the processor was clipped into positon.

The heatsink was cleaned and cliped into place, the fan was dusted and the reattached above the heatsink.

The Powersupply was replaced and screwed into position.


The DIMM Ram memory cards were clipped back into position.


The optical drive, floppy drive and hard drive were reinserted into position.


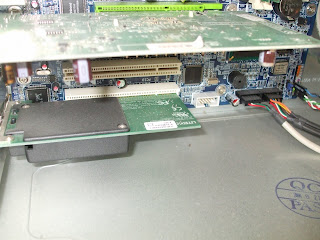
The soundcard, graphics card, network card and fiddly USB sockets were then fitted into place.


All wires were conected to the hardware.


The anti static connection was removed from the PC case and the PC was connected to its mouse, keyboard and monitor. The mains supply was reconnected.


The computer was turned on to test. There was a series of long beeps. The computer was shut down.


It was determined that long beeps indicated a problem with the ram. So after making the computer safe for working on, the ram cards were removed from the clips and reinserted.


The computer was then powered up again and this time was fully funcitonal;


the disk drives both worked and the system had sound.

PC Assembly Practical

I chose PC R37182 and checked that the PC was operational by connecting; mouse, keyboard and monitor then connecting to the mains. I booted the computer up, checked its operation and then shut down.


The powercables were then disconnected and the side panel removed. The monitor, keyboard and mouse were disconnected and put to one side.


I furneshed myself with an anti static wristband and mat and connected the mat to earth.


The network card, sound card and graphics card were removed.

The internal cables were disconnected.


The USB ports were removed.


The procedssor was uncliped and removed


The Optical drive, Floppy drive and hard drive were removed.


The ram was removed and the powersupply disconnected and removed;


The fan and heat sink were removed,


The processor was uncliped and removed.


The computer was now stripped down ready for assmebly


Saturday, 6 March 2010

The Fitsui Computer Saga

After researching I took the computer apart again.

Unfortunately I discovered that some of the pins had got bent.


Firstly I gently baked the processor and heatsink in the oven on minium temperature for about 20 minutes to warm up the thermal paste to alow me seperate it from the heatsink.


Then I attempted to straighten the pins. I went through all the credit type cars I had until I found one which was the right size to go between the pins.


Friday, 5 March 2010

The Fitsui Computer


This computer was overheating very soon after start up. The graphics would become distorted and the computer would nolonger send images to the monitor and have to have a forced shut down.


So it was decided to open the computer up and have a look inside. The computer was quite dusty, however it had been sprayed out with compressed air regually and so there was not as much dust as might otherwise have been the case.


I decided to take the heatsink off the processor, as this had never been removed and I thought that there might be a lot of dust in there.

There was.


But .....

I forgot to try and twist the heatsink off the processor before pulling it out and the whole asembly came away in one.


I then compounded my errors by trying to replace the processor into its correct position while still attached to the heat sink. This made it impossible to reach the locking leaver system for the processor.
I then put the computer back together and tested it.... it nolonger worked.


Friday, 26 February 2010

Operating Systems Basics - VISTA - continued;

The next requirement is to change to 32 bit colour and the screen resolution to 1024 x 768 pixels.


This can be achieved by right clicking on desktop, choosing personalise settings and changing the settings as required, remembering to apply settings.


The same utility as above the colour scheme and backgrounds can be changed.


Sounds can be edited by right clicking on the desktop too. The following devices can be conrolled from the volume mixer;


  1. Speakers

  2. Headphones

  3. Windows sounds


The firewall can be accessed by going to start, control panel and then choosing the security settings.


There the Firewall settings can be changed. To ensure that the firewall does not block incoming File and Printer Sharing or Remote assistance the correct box needs to be checked on the exception tab.


Update manager can also be accessed from control panel