The network settings are now set to home.
Friday, 26 March 2010
Home Network
The network settings are now set to home.
Friday, 19 March 2010
Changing the BIOS
Friday, 12 March 2010
PC R37182 reassembly
Firstly the processor was clipped into positon.
The heatsink was cleaned and cliped into place, the fan was dusted and the reattached above the heatsink.
The Powersupply was replaced and screwed into position.
The DIMM Ram memory cards were clipped back into position.
The optical drive, floppy drive and hard drive were reinserted into position.
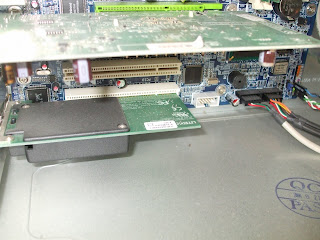
The soundcard, graphics card, network card and fiddly USB sockets were then fitted into place.
All wires were conected to the hardware.
The anti static connection was removed from the PC case and the PC was connected to its mouse, keyboard and monitor. The mains supply was reconnected.
The computer was turned on to test. There was a series of long beeps. The computer was shut down.
It was determined that long beeps indicated a problem with the ram. So after making the computer safe for working on, the ram cards were removed from the clips and reinserted.
The computer was then powered up again and this time was fully funcitonal;
the disk drives both worked and the system had sound.
PC Assembly Practical
The fan and heat sink were removed,
The processor was uncliped and removed.
The computer was now stripped down ready for assmebly
Saturday, 6 March 2010
The Fitsui Computer Saga
Friday, 5 March 2010
The Fitsui Computer
This computer was overheating very soon after start up. The graphics would become distorted and the computer would nolonger send images to the monitor and have to have a forced shut down.
I decided to take the heatsink off the processor, as this had never been removed and I thought that there might be a lot of dust in there.
Friday, 26 February 2010
Operating Systems Basics - VISTA - continued;
This can be achieved by right clicking on desktop, choosing personalise settings and changing the settings as required, remembering to apply settings.
- Speakers
- Headphones
- Windows sounds
Operating Systems Basics Practical on VISTA Machine
- Network adapter
- Display adapter
- Sound device
- CD/DVD device
- Processor speed
- Size of RAM
To determine these I went to start then control panel then Systems and Maintance.
Then View computer details and I then clicked on device manager and found the following details.
- Bluetooth Device (Personal Area Network) - manufacturer Microsoft
- Bluetooth Device (RFCOMM Protocol TDI) - manufactuer Microsoft
- Boradcom 44 x 10/100 Integrated Controller - Broadcom
- Intel(R) PRO/Wireless 3945ABG Network Connection - Intel corporation
The display adapter - Mobile Intel(R) 965 Express chipset Family - manufacuter Intel Corporation
Monday, 22 February 2010
Laptop connects to the college network
I had problems accessing the network and did understand why until I refered back to the college intranet instructions which states in small print at the end that you must enter a different user name than when using the colleges own computers.
Vola access, finally
Saturday, 20 February 2010
Laptop fails the securtiy test
The updates on the laptop were out of date and the college did not like the antivirus software I had installed. I had to take the laptop home and install a free version of AVG and make sure that all the windows updates were installed.
Friday, 19 February 2010
Logging the laptop onto the college network
Friday, 12 February 2010
Crossover Cable construction.
Today I made a category 5 unshielded Twisted Pair (UTP) Ethernet crossover cable. This was then tested for continuity and correct pin-outs, and correct wire on the right pin.
I cut the cable to the required length and cut back the plastic jacket from the wire and pulled the plastic cover back down the length of the wire.
The internal wires were laid in the following order from left to right;
· White/orange
· Orange
· White/Green
· Blue
· White/Blue
· Green
· White/Brown
· Brown
Then they were straightened out, flattened the internal wires and the wires were trimmed to be level.
I held the RJ-45 plug with the copper connections facing me and gently slipped the wires into the plug and towards the connectors.
I then crimped the wires firmly in place.
I then fitted a plug to the other end of the cable.
It is important to test the cable on completion. I plugged both ends of the cable into the unit and switched it on to proceed with the test.
There were two separate bars of indicators on the test unit, each with 8 lights. The indicator lights switch on as the test sequence is completed, wire-by-wire. If both the “input” and “output” indicators for each wire are brightly lit this indicates optimum connection. A dim light indicates poor connection and no light no connection. The lights should light in pairs indicating correct wiring.
http://cableorganizer.com/learning-center/how-to/how-to-test-RJ45-connection.htm
Unfortunately, as the test preceded lights 4 and 5 showed out of order meaning that the plugs failed the test. Two of the wires in one of the plugs were in the incorrect sequence and one plug failed the test.
I had to remake the wire. This time I took a lot more care when inserting into the plastic plug to ensure that the wires remained in correct order.
The cable was tested and found satisfactory